I needed an easy Halloween craft—one that I would want to keep for multiple years. It also had to be something anyone from ages 7 to 45 could do. Pinterest and Google didn’t offer anything quite right, so I came up with these DIY Halloween Coasters.
Not only are they fun to make, but they are also versatile. Want a more sophisticated look? Create four different black-and-white spiderweb coasters. Prefer traditional decor? Make four jack-o-lantern coasters instead!
Some links in this post are affiliate links. As an Amazon Associate I earn from qualifying purchases. I appreciate your support if you choose to use them at no extra cost to you!
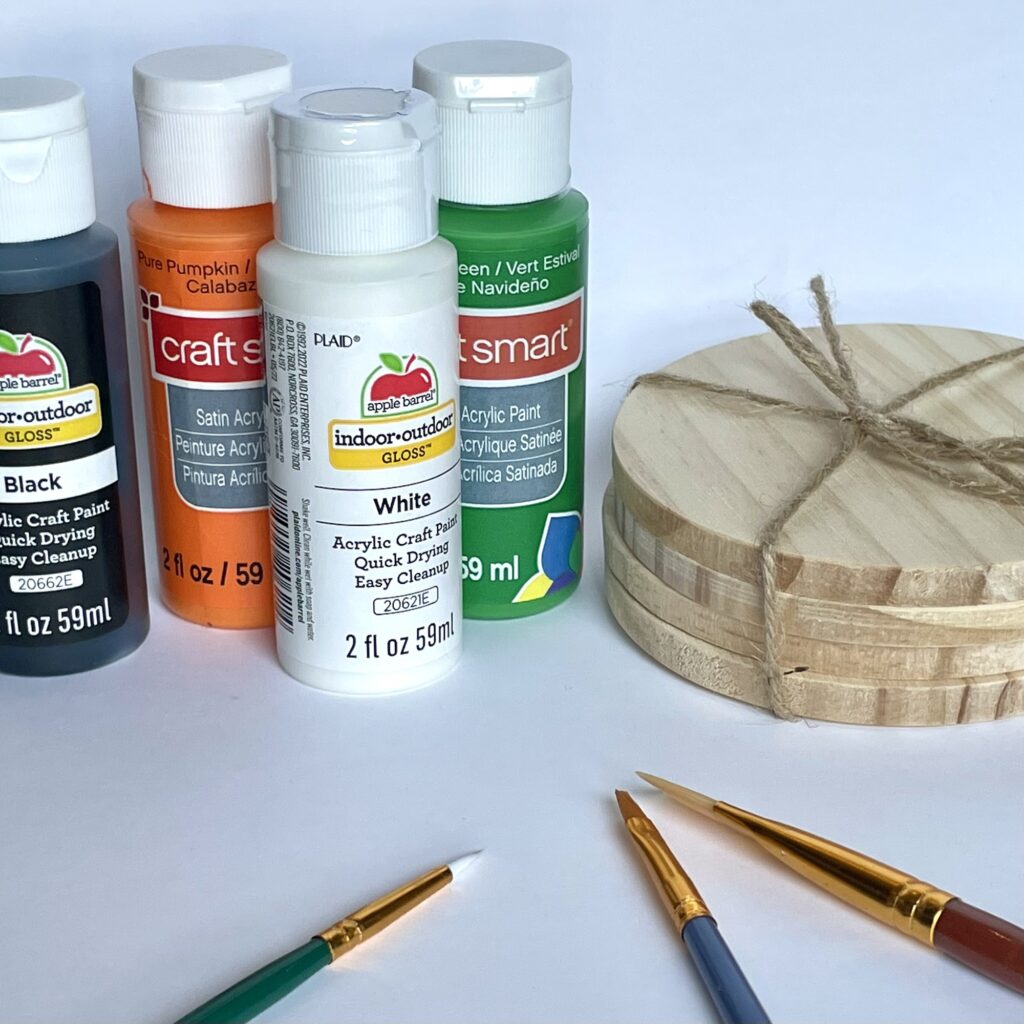
Materials
- 4 wooden coasters
- Acrylic craft paint
- Paint brushes
- Multi-purpose sealant
I bought several packs of 4 coasters from JoAnns, because I was planning on a set of four coasters for three families. Ordering a bulk pack of coasters from Amazon may have been easier.
I used the acrylic craft paint and brushes I had around the house. If you are doing the same and only have primary colors (red, yellow, & blue) you can make orange and green by mixing the paint. If you are looking to get more or new paints you can do a multi colored pack (this option is the easiest if you’re ordering online) or you can buy paint in individual colors: orange, green, white, and black. I typically paint with a matte finish. The final finish for these DIY Halloween Coasters will be determined by the finish of the sealer you have.
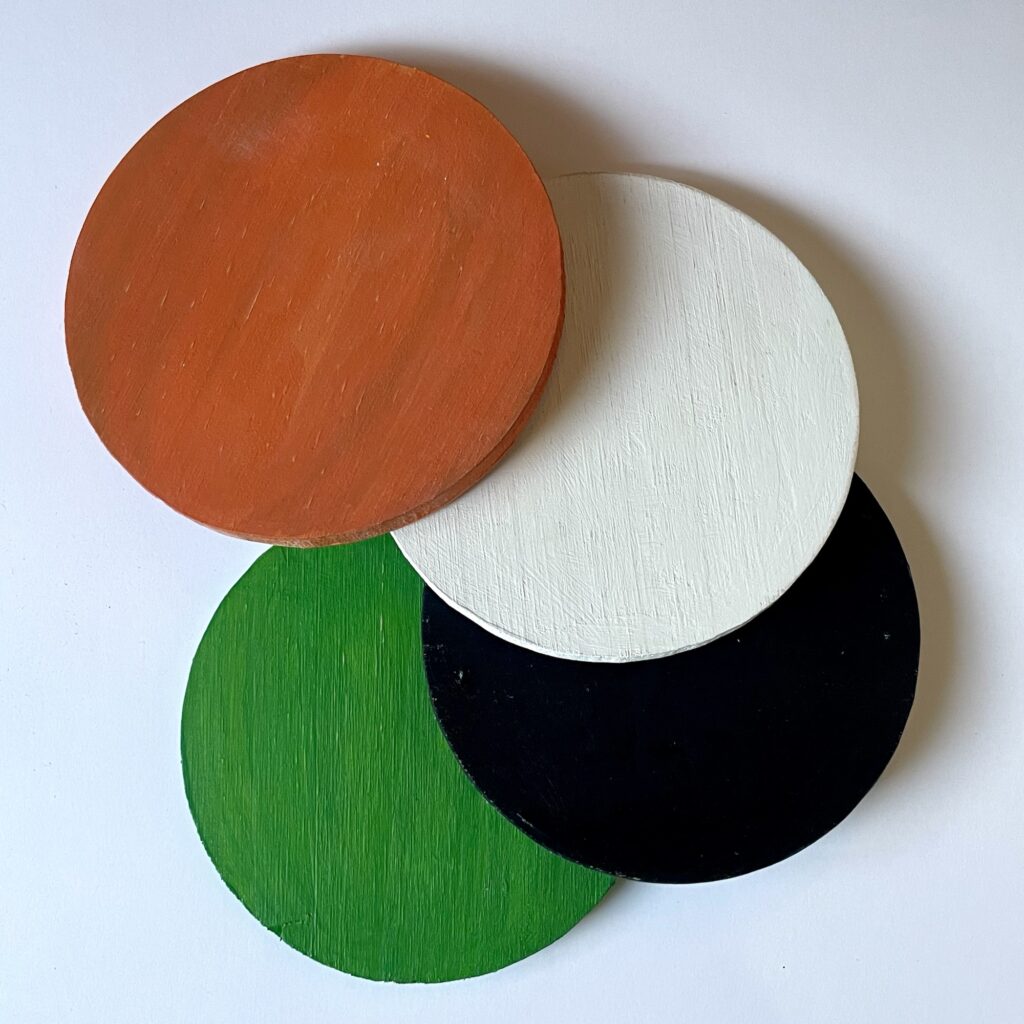
Step 1: Paint the base color for each coaster.
Paint the front, back, and sides of each coaster. Each coaster should have a solid base color. The recommended colors are orange, green, white, and black.
Let the paint dry.
Tips:
- Allow enough drying time. The base colors may take a while. You’ll need to do the front and sides, let them dry, and then paint the back.
- Multiple coats may be needed. For example, the green paint was more translucent than expected, and it required several coats for a solid finish. The basic craft paint I used, dried quickly. It took about 20 minutes between coats.
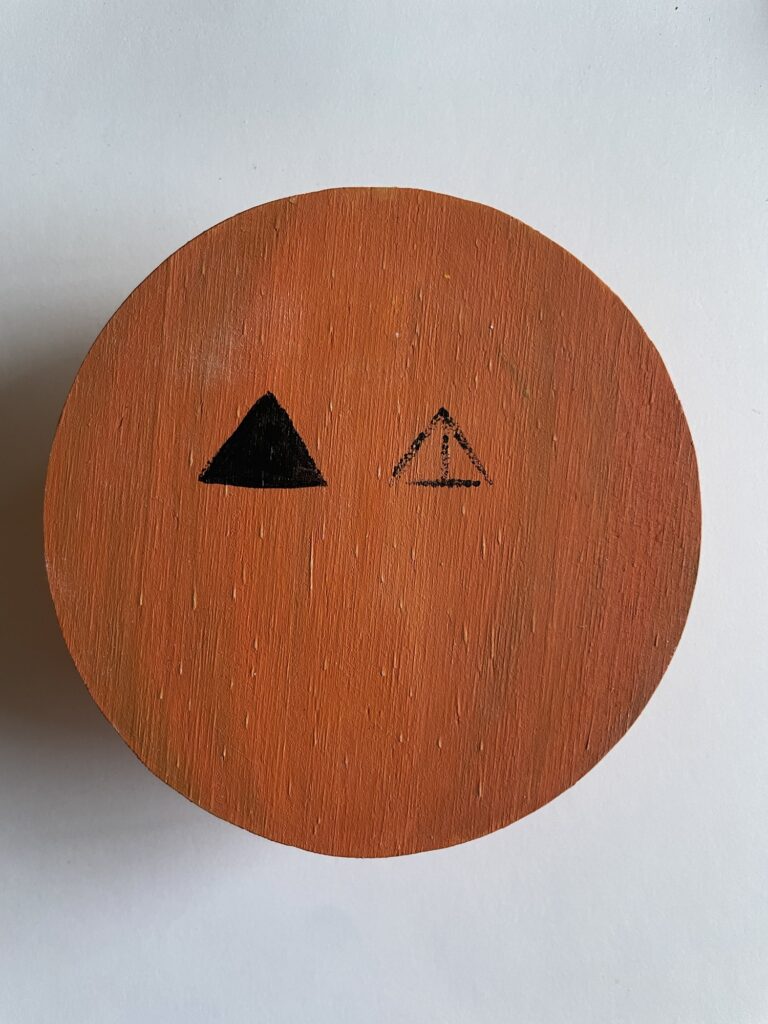
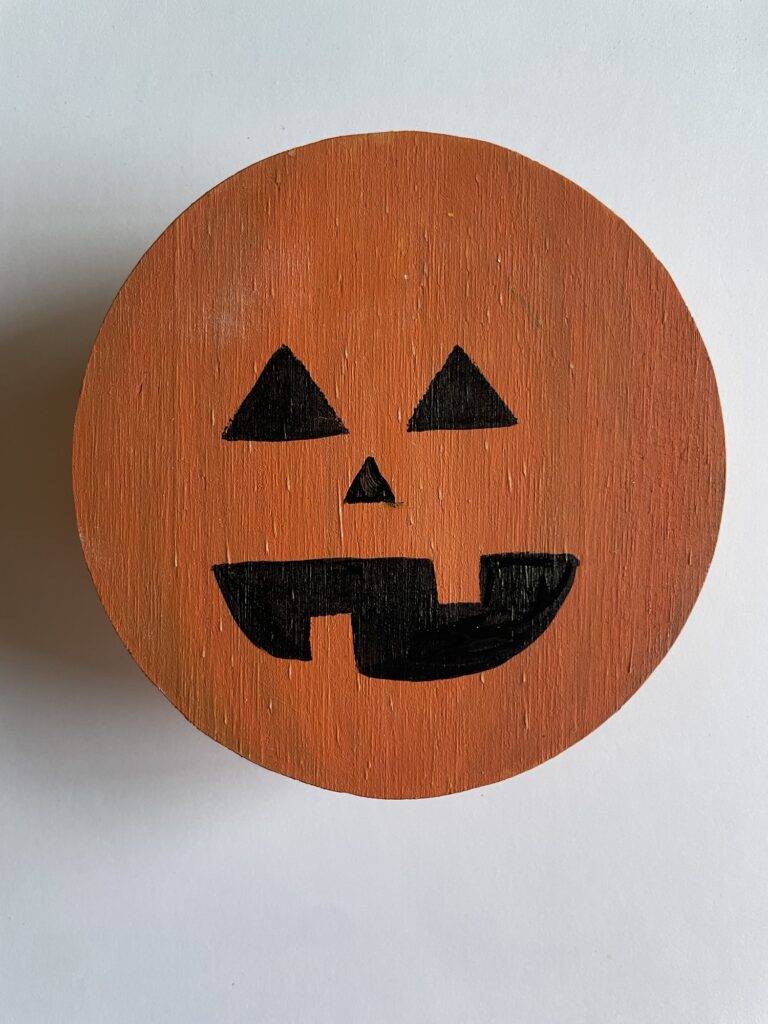
Step 2: Paint the Halloween designs on each coaster.
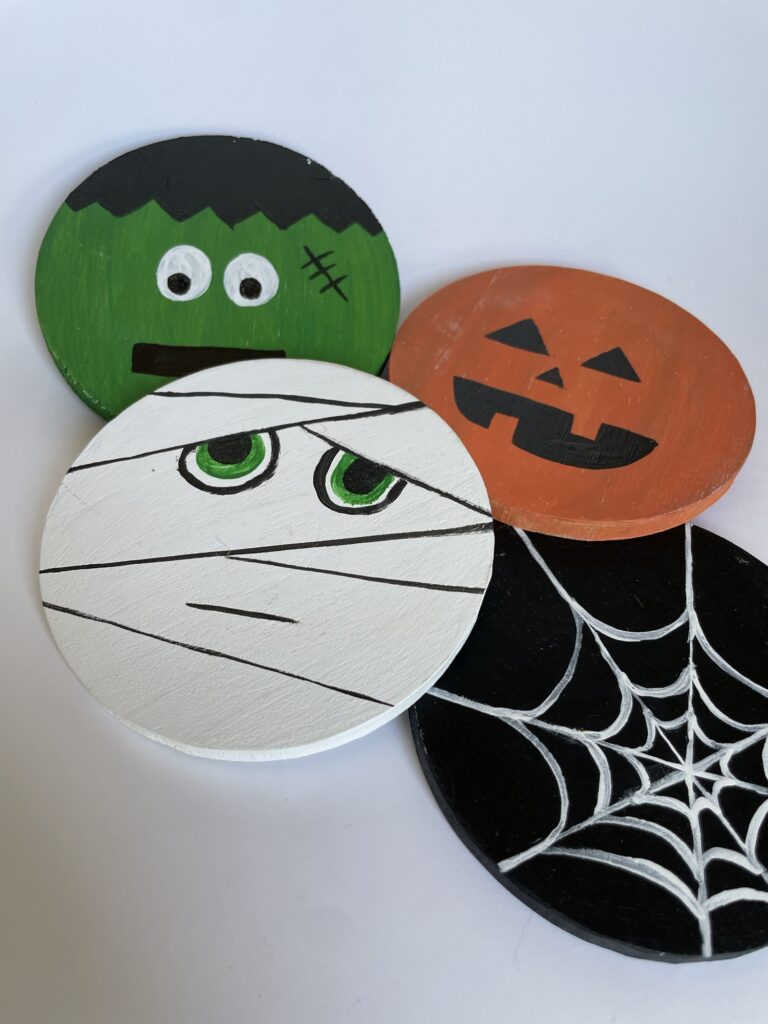
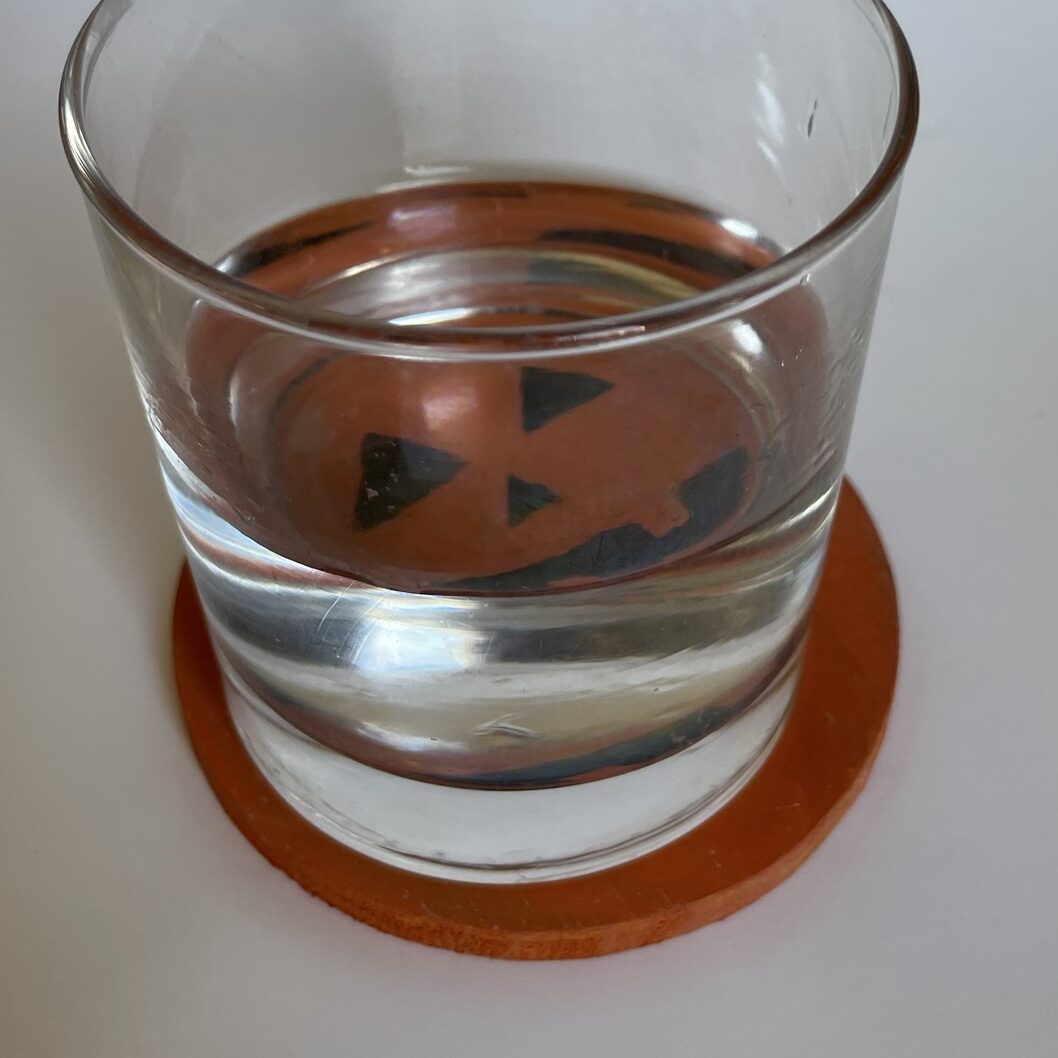
Pumpkin
- Use the orange coaster.
- Paint your favorite jack-o-lantern face using black paint. I chose triangle eyes, a triangle nose, and a smile with a tooth on both the top and bottom.
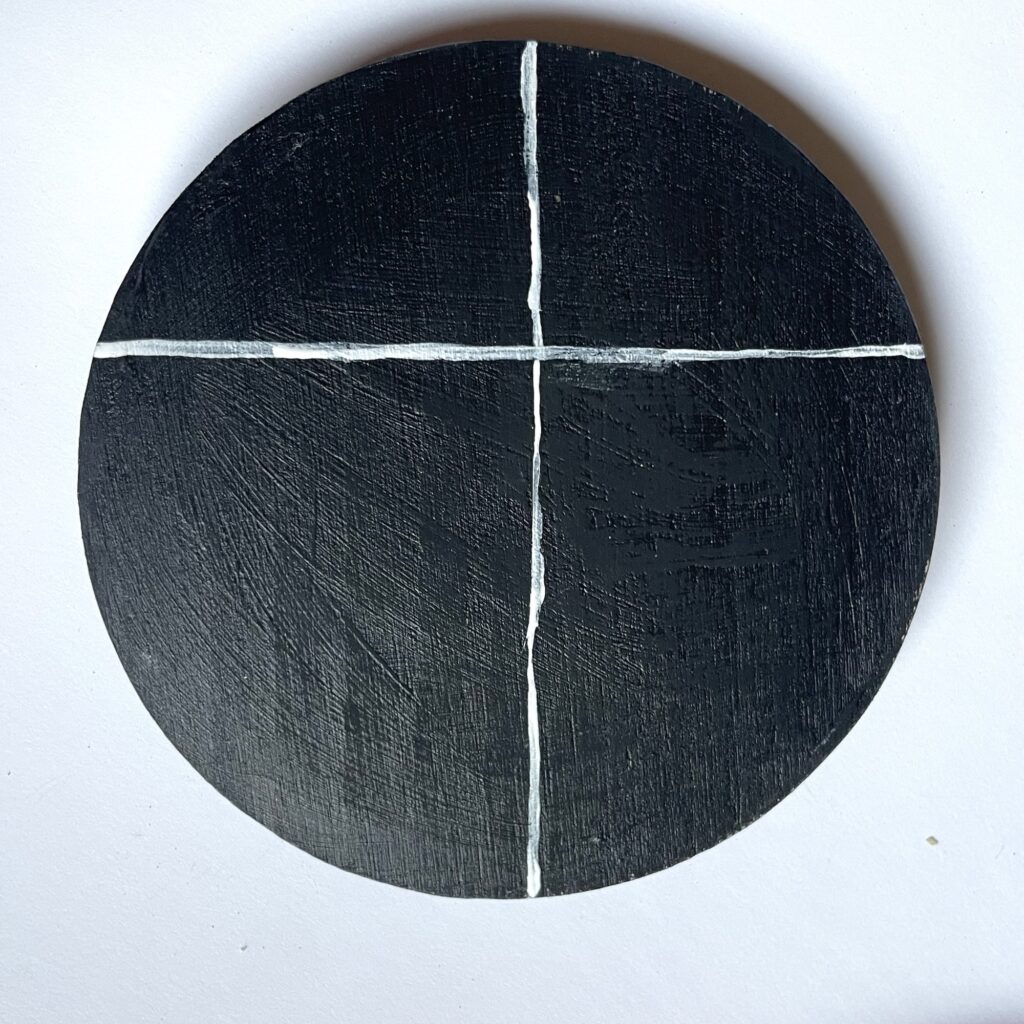
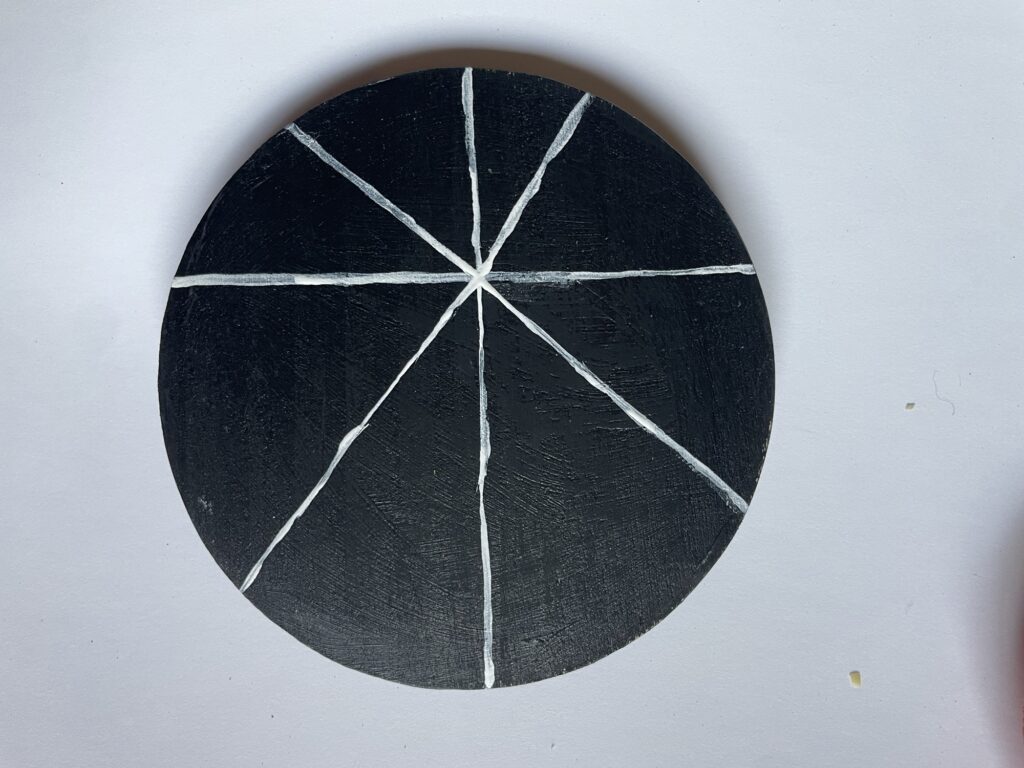
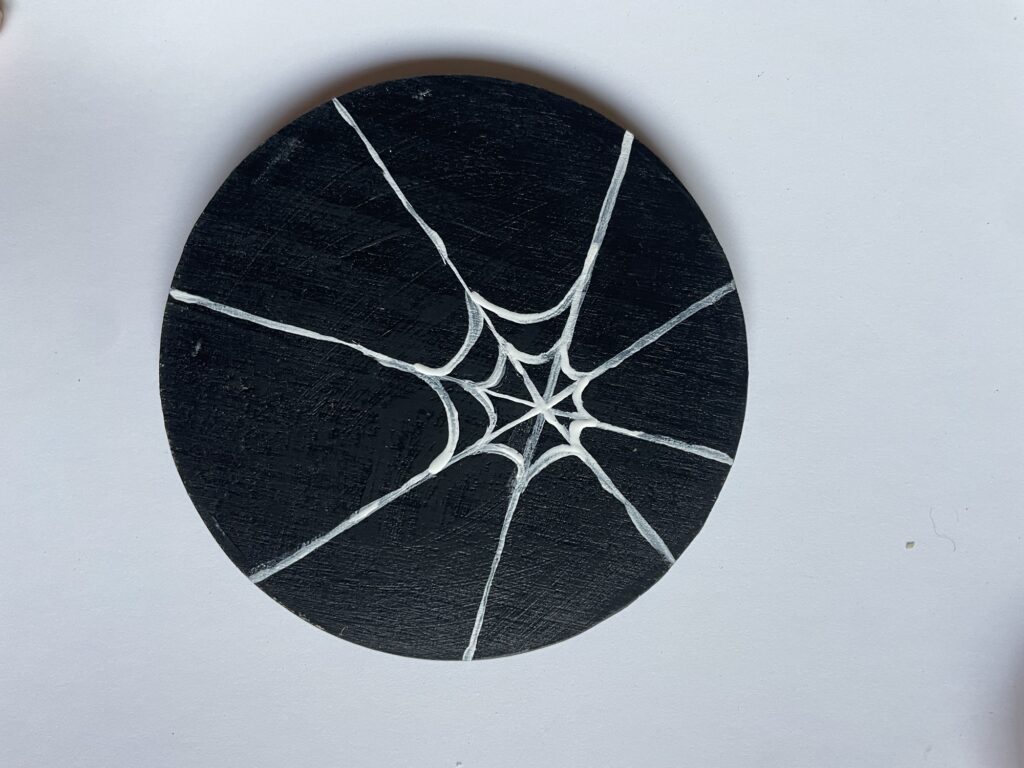
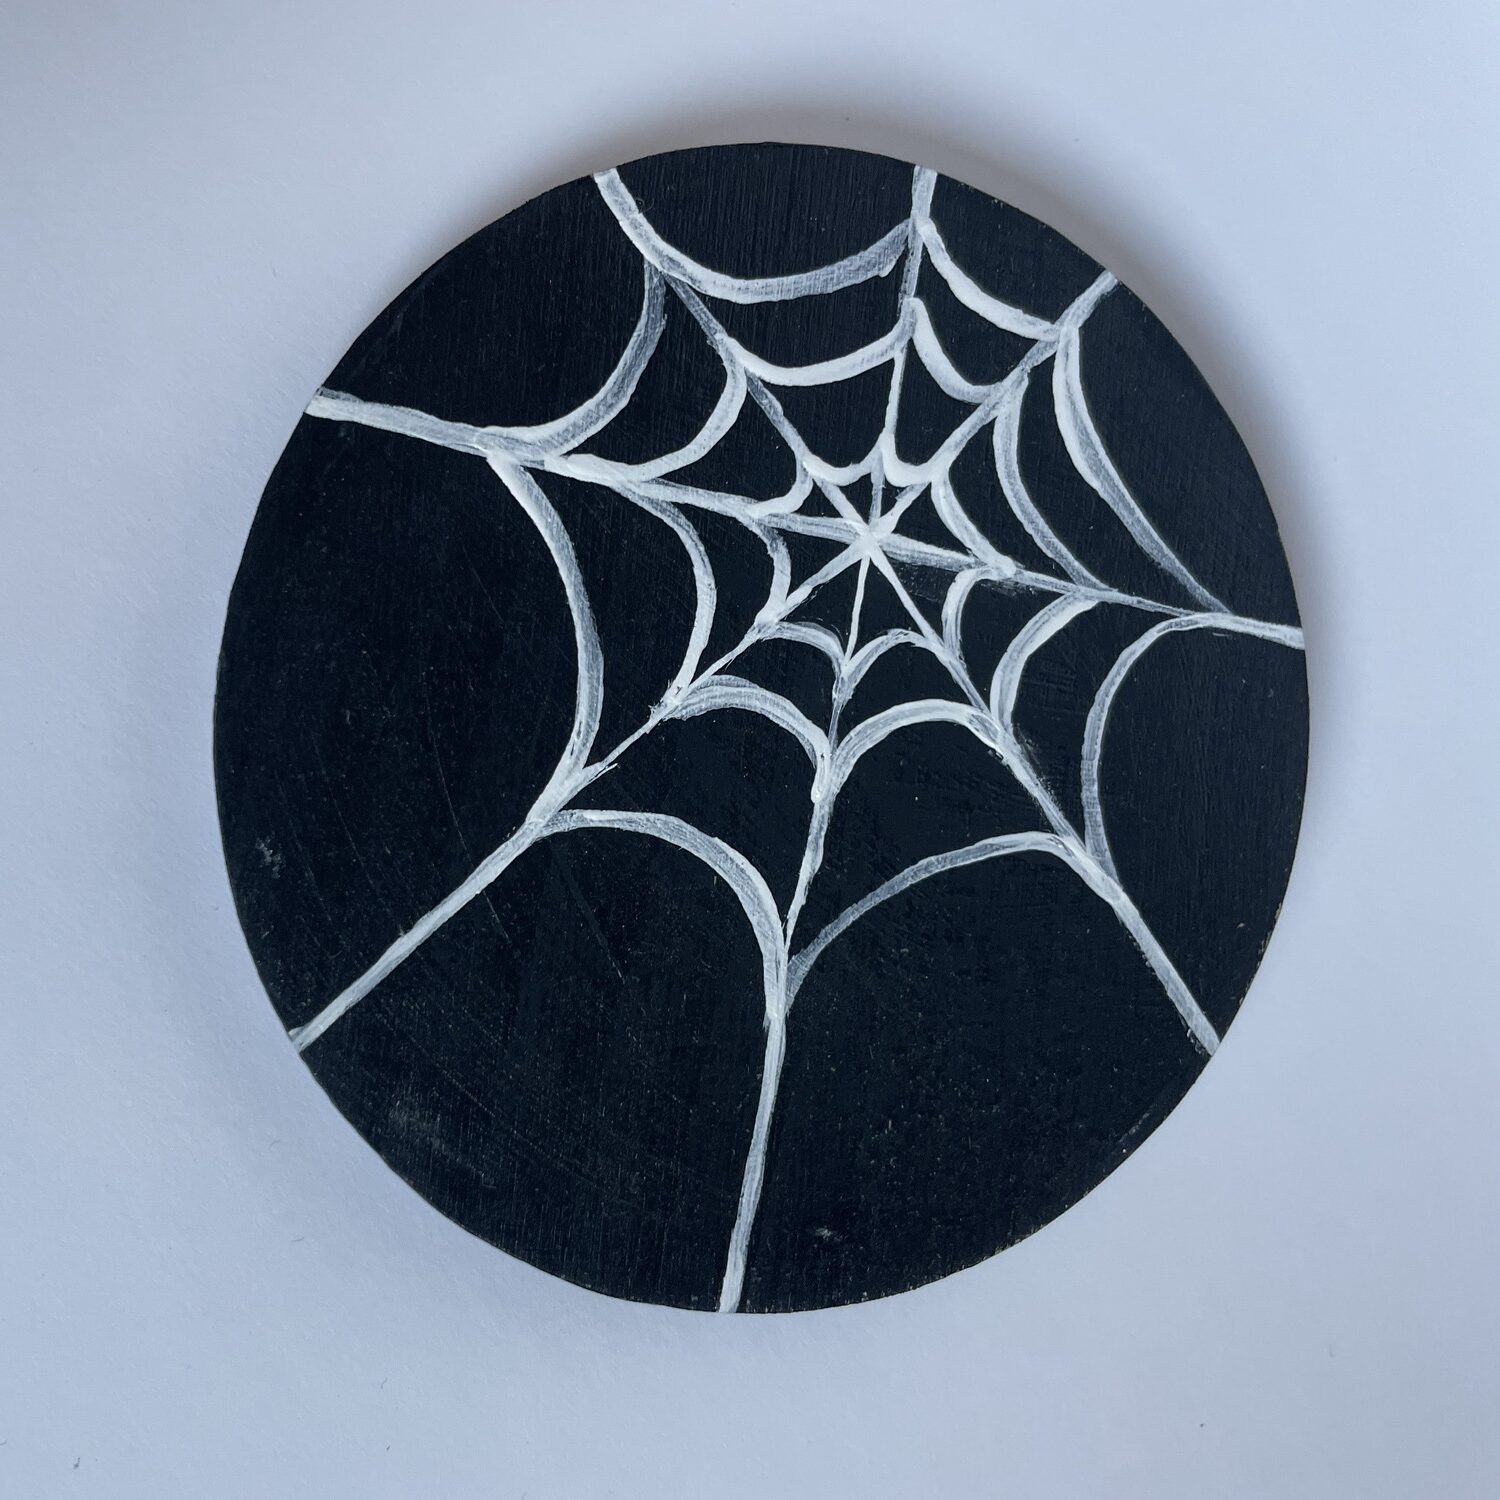
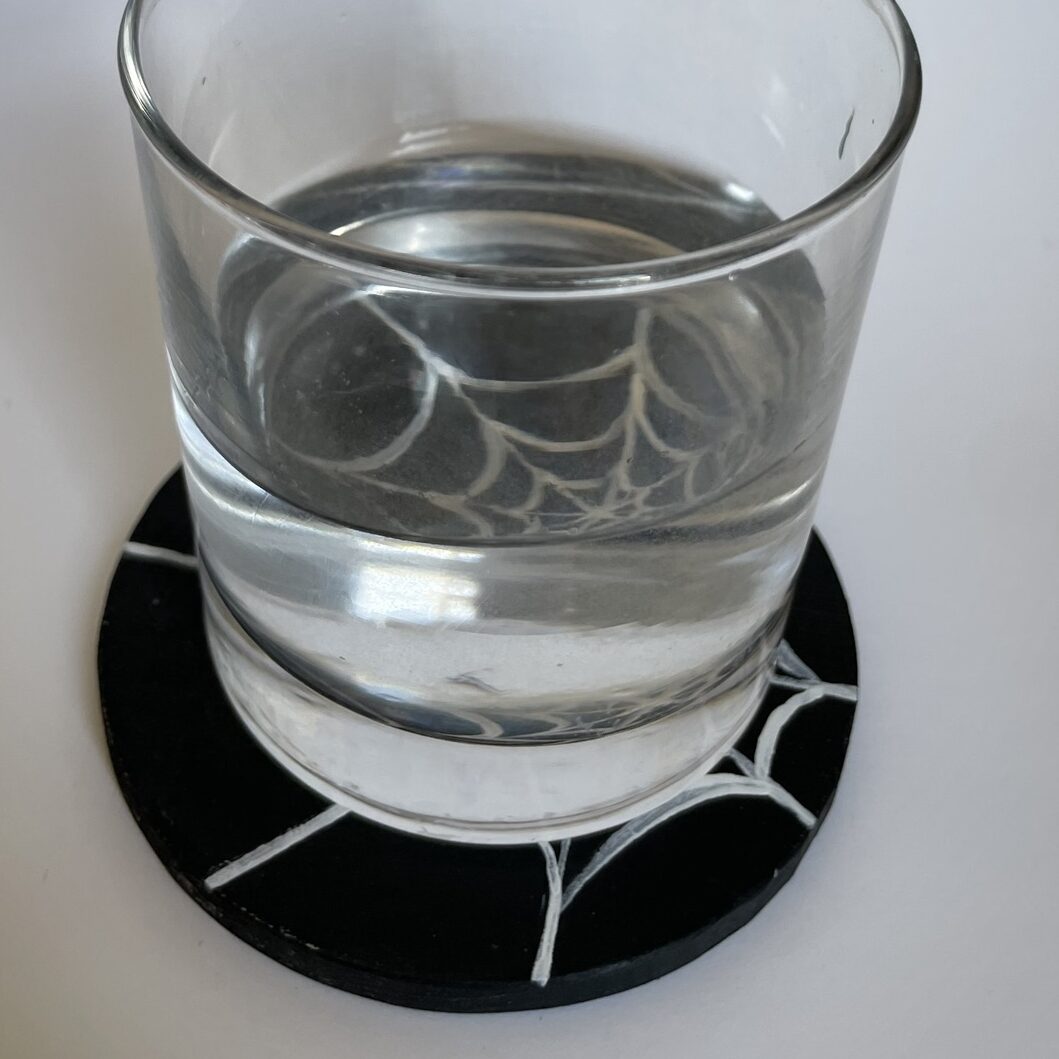
Spider Web
- Use the black coaster.
- Paint two intersecting lines in a cross anywhere on the coaster. The intersection will be the center of the web.
- Add another set of intersecting lines, crossing the first set.
- Starting near the center, paint a small “u” shape between two of the lines. The bottom of the “u” should point toward the web’s center.
- Continue making “u” shapes all around, creating a circular web pattern. There will be eight “u” lines.
- Repeat this process to create more layers of the web. I made three layers, but you can add more if desired.
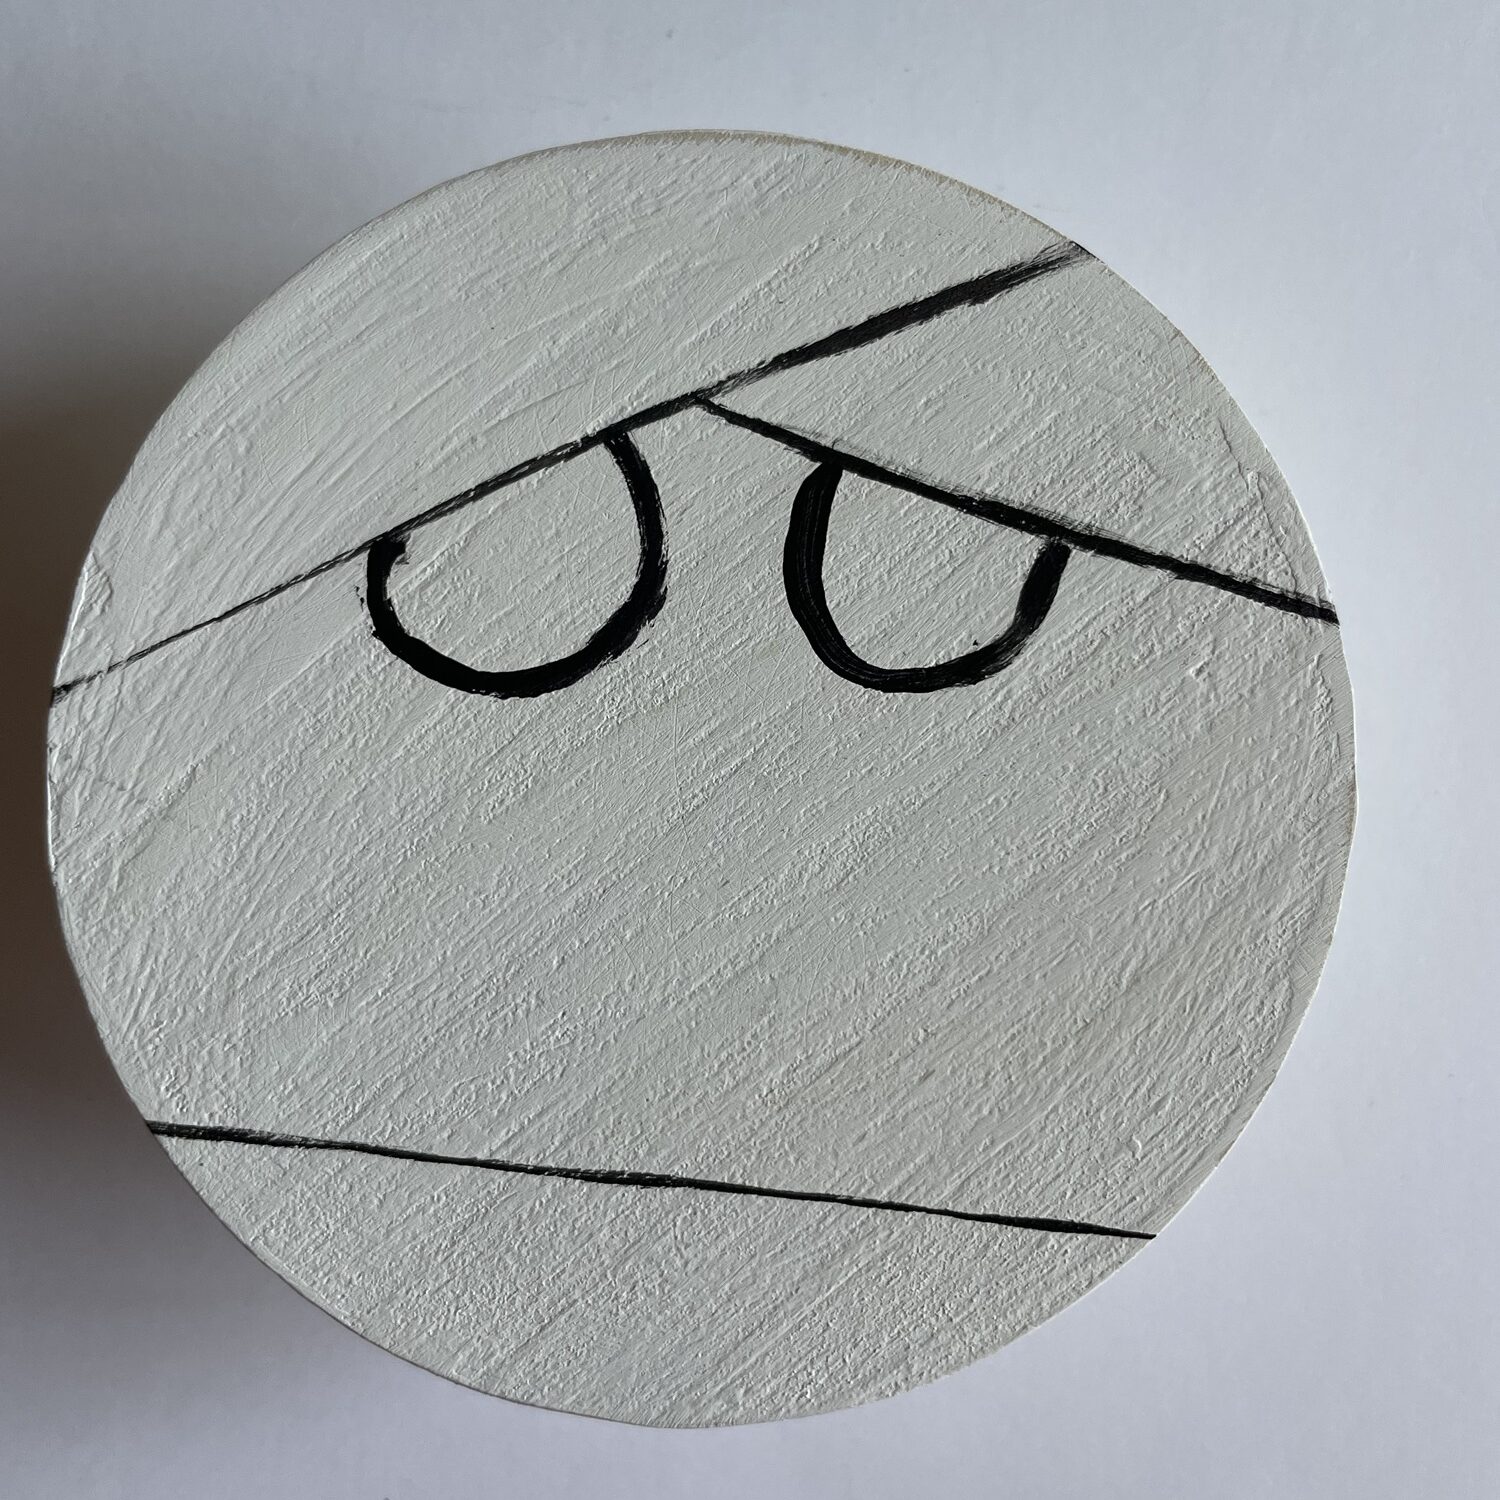
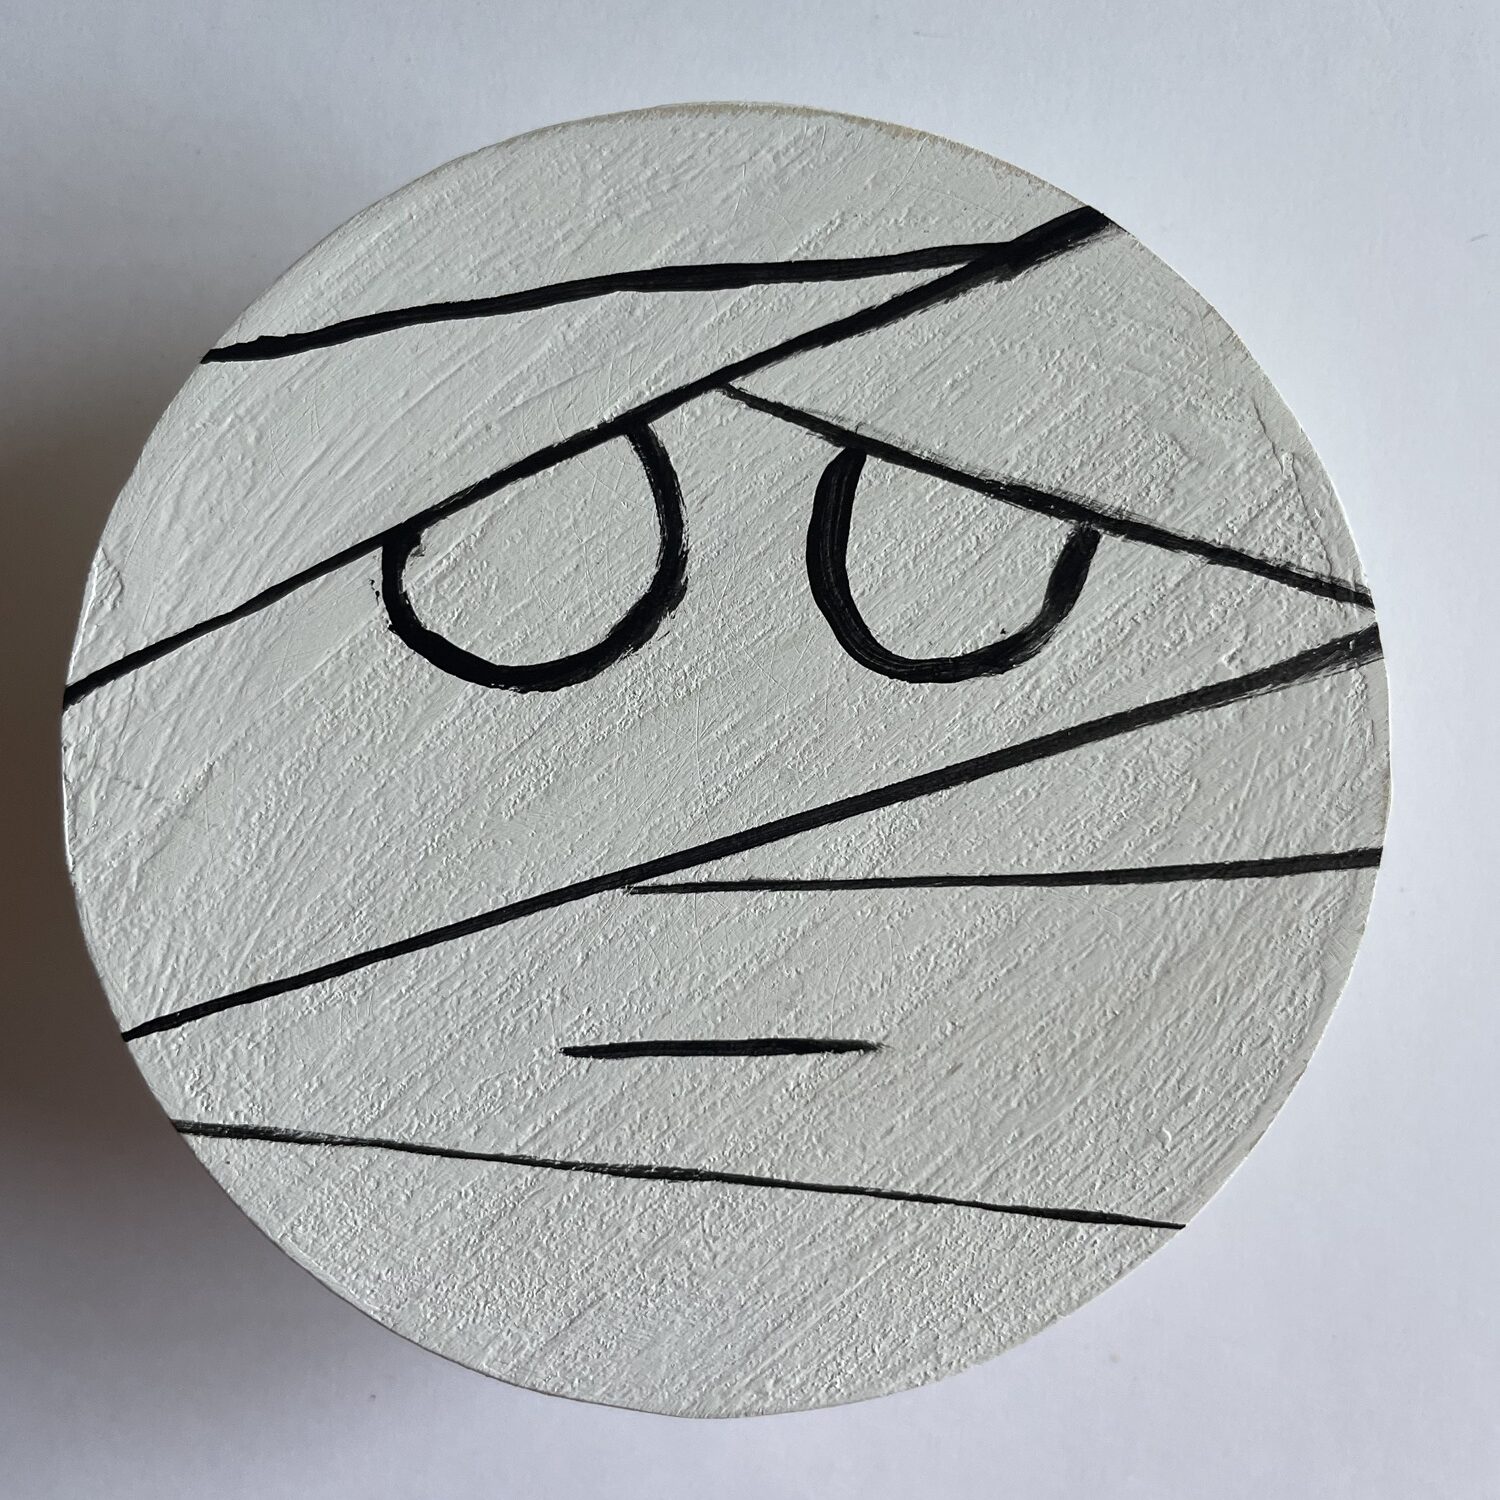
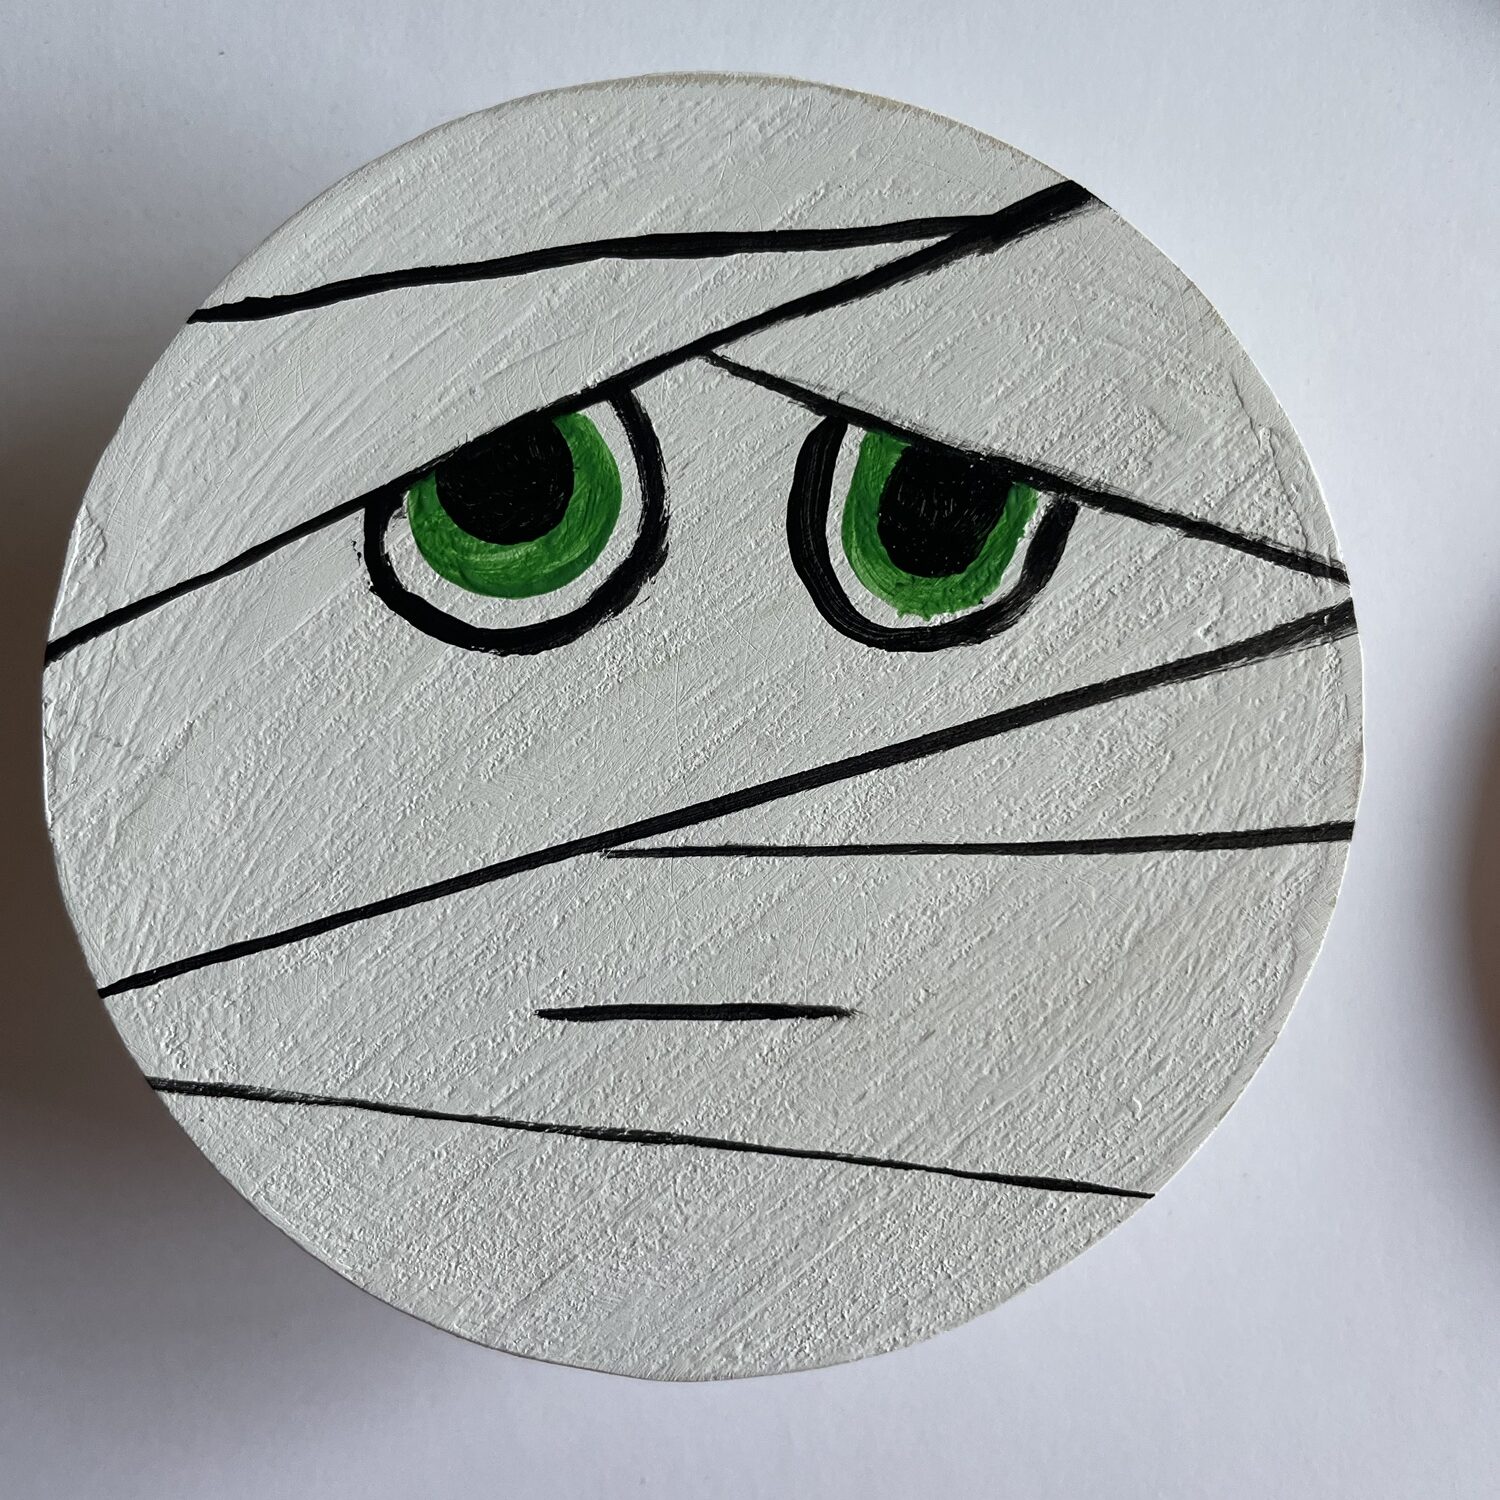
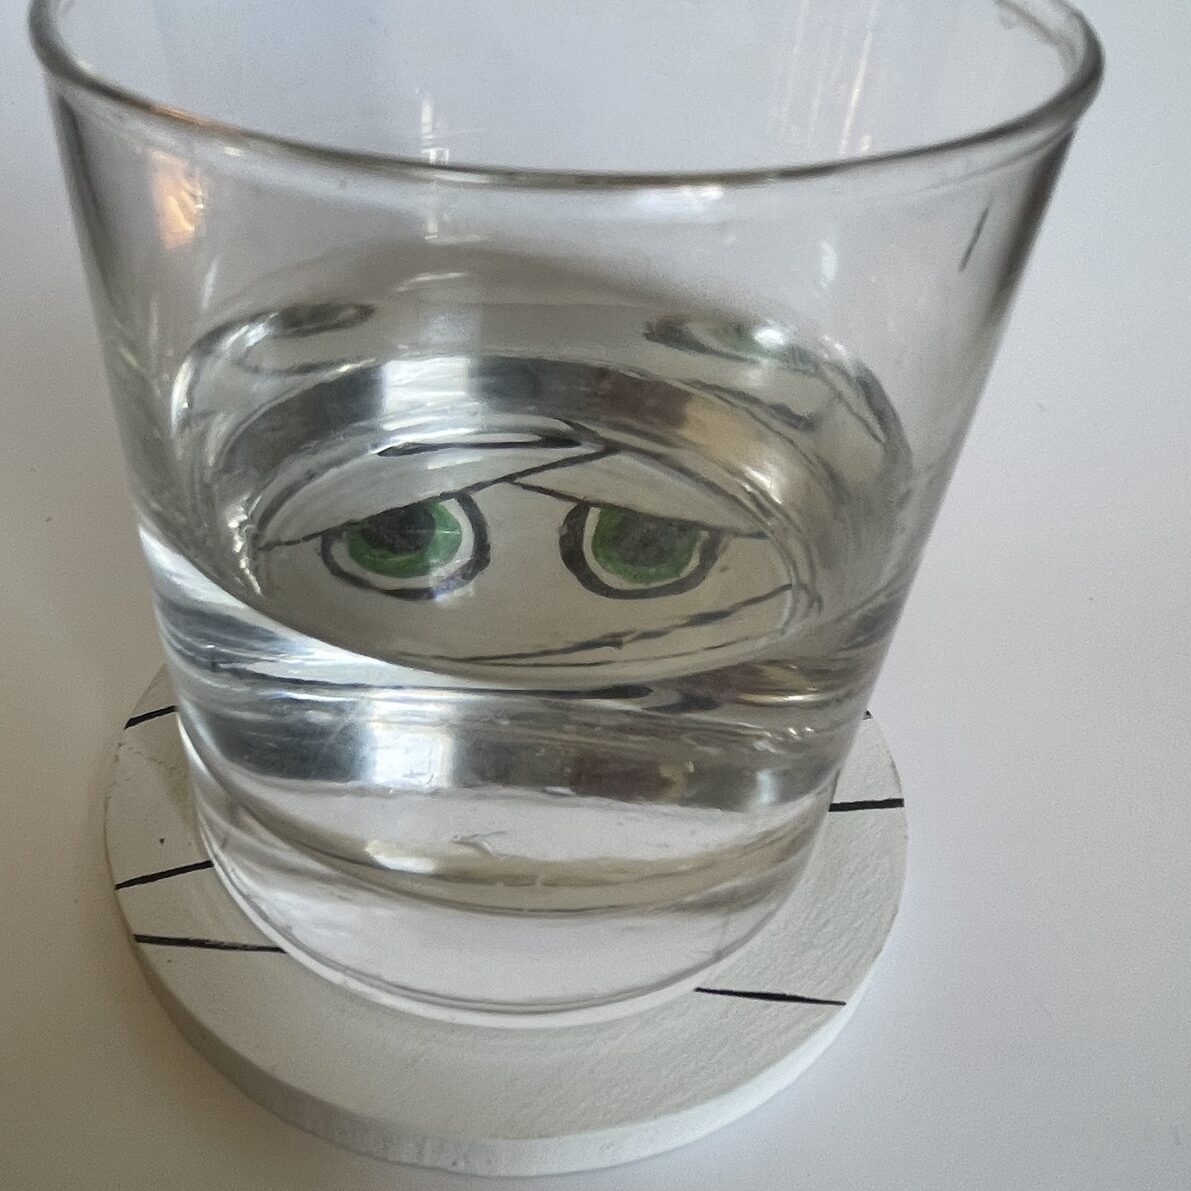
Mummy
Use the white coaster.
- Use the white coaster
- Paint an angled line across the coaster for the eye line. This should be off-center.
- Add a shorter line going in the opposite direction, starting at the midpoint of the first line and extending to the coaster’s edge.
- Paint a straight line across the bottom of the coaster.
- Paint two half-circles for eyes, emerging from the first two lines.
- Add a short line for the mouth.
- Paint additional mummy wraps as desired, such as one across the forehead and another near the mouth.
- Choose an eye color (I used green to match the Frankenstein coaster) and paint in the eyes.
- Once the eyes are dry, paint the black pupils.

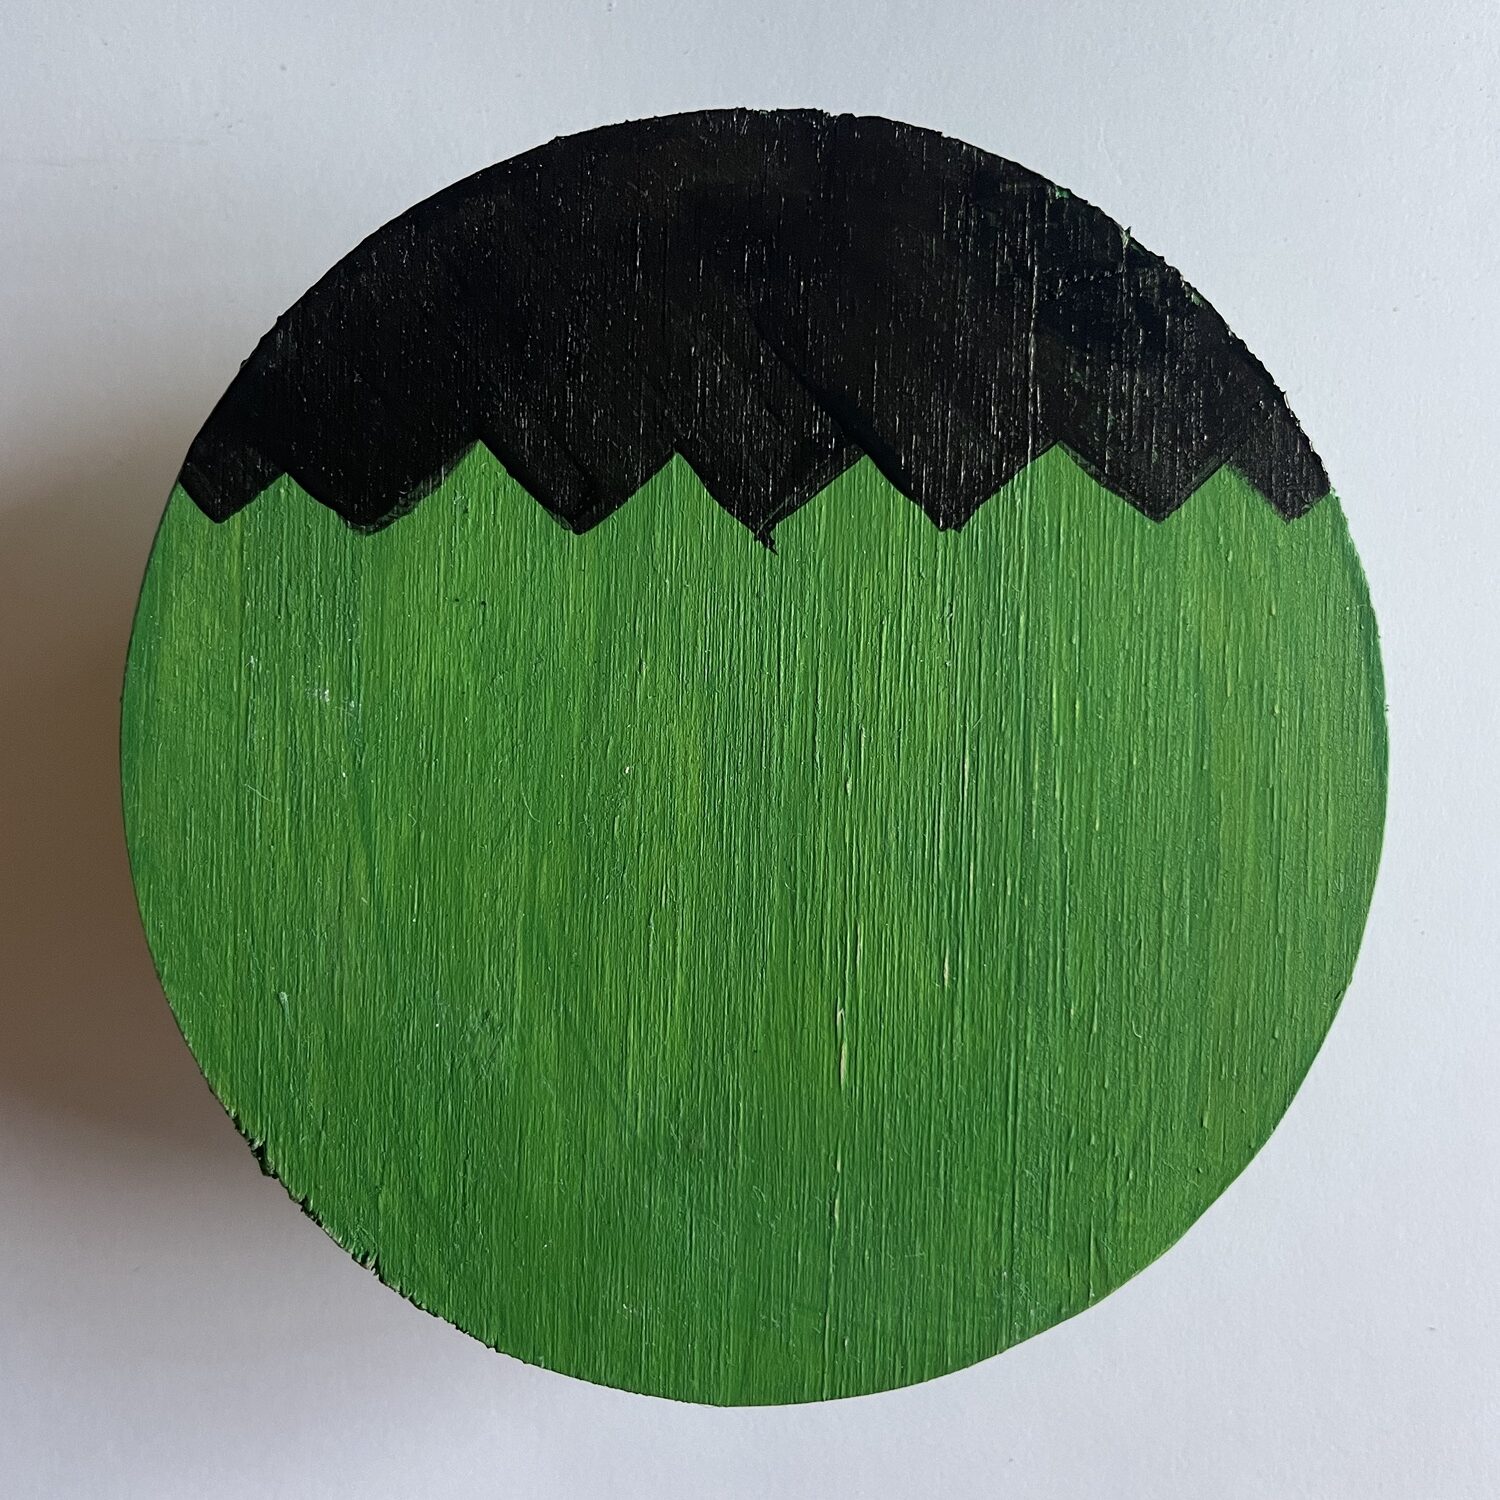
Frankenstein
Use the green coaster. To make the face:
- Paint black zigzag lines across the top of the coaster for the hairline.
- Paint in the hair, including the sides where it meets the edges of the coaster.
- While using black paint, add the mouth and a scar.
- Paint two white circles for the eyes and let them dry. The eyes are about the size of dimes.
- Once dry, paint black pupils in the center of each eye.

Step 3: Seal the coaster.
Once the designs are dry, apply a wood sealer to coat the coasters. Paint the top and sides, allow them to dry, then seal the bottom.
Step 4: Enjoy your new coasters!
In just a few steps, you’ll have a fun and functional set of DIY Halloween coasters. These coasters are perfect for Halloween parties, spooky decorations, or as unique gifts for friends. Whether you go with a classic pumpkin design or try a mummy or spiderweb, this craft is sure to add a bit of homemade charm to your seasonal decor.
Further Reading:
Want More from With Grace and Wit? Join our email list.
Pingback: Easy, Do-It-Yourself Painted Christmas Coasters - withgraceandwit.com